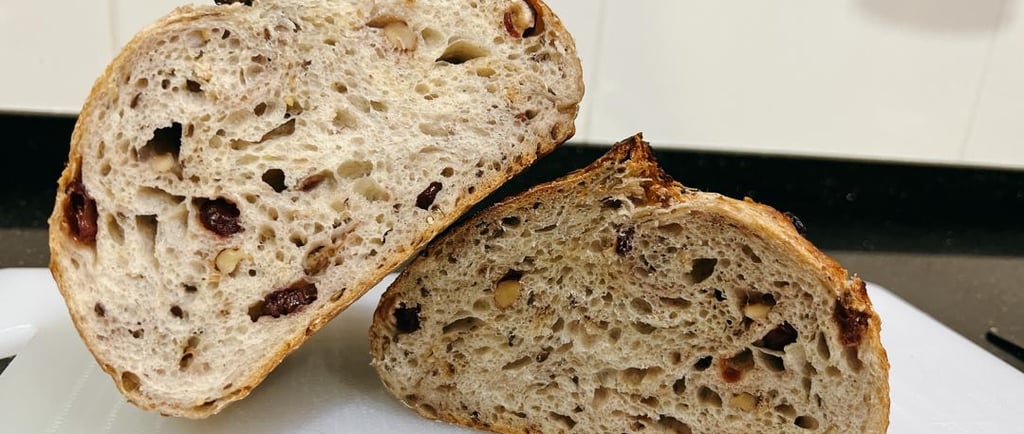
Healthy Sourdough bread For you and your family!
How to Make Sourdough Starter from Scratch
Learn how to make sourdough starter from scratch with our step-by-step guide. Perfect for beginners, this detailed tutorial will help you create your own delicious sourdough starter at home!
Grace Ng
11/21/20248 min read
Introduction to Sourdough Starters
A sourdough starter is a mixture of flour and water that has fermented over time, cultivating wild yeasts and lactic acid bacteria present in the environment.
This natural fermentation process serves as the leavening agent for sourdough bread, allowing it to rise without the need for commercial yeast.
The unique combination of these microorganisms not only helps to leaven the dough but also contributes to the distinctive flavor and texture that characterizes traditional sourdough bread.
The purpose of a sourdough starter extends beyond merely acting as a rising agent. It creates a vibrant ecosystem of beneficial bacteria and yeast that greatly influences the taste of the final product.
As the starter ferments, it develops complex flavors, including a subtle tanginess and depth that can be attributed to the lactic acid produced during the fermentation process. Additionally, sourdough bread is often appreciated for its robust crust and chewy crumb, which are enhanced by the natural fermentation that occurs with a mature starter.
The rising popularity of sourdough bread among home bakers and artisanal bread makers is driven by several factors. Many individuals are drawn to the health benefits associated with sourdough fermentation.
For instance, the long fermentation process can enhance the digestibility of the bread and reduce antinutrients, making nutrients more bioavailable. Furthermore, the presence of lactic acid bacteria contributes to a lower glycemic index compared to conventional bread, making sourdough a healthier option for many consumers.
In light of the benefits and unique qualities associated with sourdough, creating a sourdough starter from scratch can be an enriching endeavor. It allows bakers to engage with the process of fermentation, exercise creativity in flavor development, and ultimately craft delicious and nutritious bread at home.
Ingredients Needed for Your Sourdough Starter
To create an effective sourdough starter from scratch, only a few simple ingredients are required. The primary components are flour and water, with a few optional additives that can enhance the fermentation process. Each element plays a crucial role in cultivating the wild yeast and beneficial bacteria necessary for a successful starter.
Flour is the cornerstone ingredient in a sourdough starter. While many types of flour are suitable, using organic flour is highly recommended.
Organic flour tends to contain more natural yeast and is less processed, providing a better environment for fermentation. Whole wheat flour and rye flour are particularly beneficial, as they contain higher amounts of nutrients that support yeast activity. You may start with all-purpose flour, but incorporating whole grain options can accelerate the fermentation process.
Water is the next essential component. It is vital to use non-chlorinated water, as chlorine can inhibit the growth of yeast and bacteria necessary for the starter's development.
Filtered or bottled water is ideal, as it is free from chemicals that could adversely affect your sourdough starter. The temperature of the water should be lukewarm, as this encourages an optimal environment for the yeast to thrive.
Optional ingredients, while not necessary, can enhance the starter's fermentation capabilities. Some bakers choose to add a small amount of fruit, such as apple or pineapple, to introduce additional wild yeasts.
Others may incorporate honey or malt extract to provide extra sugars that promote yeast activity. These additions can foster a more robust starter; however, it is essential to monitor the starter's consistency and fermentation closely.
In summary, the key ingredients for a successful sourdough starter are organic flour, non-chlorinated water, and optional additives that can aid fermentation. By carefully selecting and preparing these components, you lay the foundation for a thriving sourdough starter.
Days 1-3: Creating the Initial Mixture
Creating a sourdough starter is an exciting journey that begins with the initial mixture of flour and water. This foundational step is critical for developing the unique flavors and textures that sourdough is known for.
To start, choose a suitable container—preferably a glass jar or a plastic bowl—to ensure easy monitoring of the starter’s progress. For the best results, maintain a ratio of 1:1 by weight, meaning equal parts flour and water. A common starting point is 100 grams of all-purpose flour and 100 grams of lukewarm water.
When combining the ingredients, use a clean spoon to mix the flour and water until they form a homogenous paste. It is important to ensure there are no dry patches of flour, as this could hinder the fermentation process. Once mixed, cover the container loosely with a lid or a clean cloth.
This allows air circulation while preventing contaminants from entering the mixture. Place the container in a warm environment, ideally between 70°F to 75°F (21°C to 24°C), as this temperature promotes the growth of beneficial wild yeasts and bacteria.
Over the next few days, check the mixture daily for bubbles, a sign of fermentation. If you do not observe bubbles, don’t be discouraged; this process can take several days to initiate. It is important to maintain consistent conditions to encourage yeast growth.
If your environment is too cool, consider placing the mixture in a warmer spot or using an appliance like an oven with the light on.
Also, keep in mind that stirring the mixture once daily introduces air and aids in the development of the starter. Proper care during the initial three days lays the groundwork for a robust sourdough starter, setting the stage for successful baking endeavors ahead.
Days 4-7: Feeding Your Starter
As you enter the fourth day of nurturing your sourdough starter, it is crucial to establish a consistent feeding routine to ensure its development. A well-fed starter is characterized by active bubbling and rising, indicating that the wild yeast and beneficial bacteria are thriving.
The general feeding schedule for days 4 to 7 involves discarding half of your starter before each feeding to maintain a manageable quantity and promote a vigorous culture.
For each of the feedings during this period, you will need to add equal parts flour and water to your remaining starter by weight.
A common method is to retain approximately 50 grams of starter and feed it with 50 grams of all-purpose flour and 50 grams of lukewarm water. If you prefer whole wheat flour, this can further enhance the starter's activity due to the higher nutrient content found in whole grains.
It is advisable to feed your starter every 24 hours throughout this period. However, depending on the environmental conditions—such as temperature and humidity—it may be beneficial to adjust the feeding frequency.
If the starter appears to peak quickly and begins to fall or develops a sour aroma, consider feeding it more frequently.
During these days, you should be vigilant for signs of successful fermentation. Bubbles forming on the surface and the starter rising in volume indicate that it is fermenting properly.
Conversely, if you observe a lack of bubbles, a very liquid consistency, or an unusually strong smell, these may be signs of a sluggish starter. In such cases, ensure the water temperature is not too cold, and try feeding it with a slightly higher ratio of flour to water.
With patience and attentive care, your sourdough starter will continue to strengthen, preparing for the next phase of its journey.
Testing for Readiness: How to Know Your Starter is Active
Determining the readiness of your sourdough starter is a crucial step before using it for baking. An active starter is characterized by its ability to rise effectively and produce a pleasant aroma. One of the most effective methods to test for activity is the 'float test'.
To perform this test, simply take a small spoonful of your starter and gently place it in a glass of water. If the starter floats, it indicates that it is well-aerated and has developed enough gases, suggesting that it is ready to be used. If it sinks, it may require more time or additional feedings to develop the necessary yeast activity.
Apart from the float test, other signs can help determine the maturity of your sourdough starter. The aroma of your starter is an important indicator; a healthy starter typically emits a refreshing, slightly tangy scent, reminiscent of yogurt or fruit. Conversely, any off-putting or excessively pungent odors may indicate that the starter has gone bad or has become overly acidic.
Another critical factor to consider is the consistency of the starter. An active sourdough starter should have a fluffy, thick texture that easily holds air bubbles.
Over time, as you feed your starter, it should become more stable and predictable in its rise and fall. Pay attention to the volume increase post-feeding—an ideal starter should at least double in size within a few hours after being fed.
To maintain a healthy starter and ensure optimal rising ability, consistent feeding practices are essential. Regularly discard a portion of your starter and provide it with fresh flour and water, keeping the ratios balanced for sustainable growth.
By observing these tests and signs, you can confidently decide when your sourdough starter is ready for baking delicious homemade bread.
Maintaining Your Sourdough Starter
Once your sourdough starter is established, its maintenance becomes crucial for achieving optimal baking results. The foundation of maintaining a healthy sourdough starter lies in regular feedings, typically at least once every 24 hours if kept at room temperature.
A consistent feeding schedule ensures that the yeast and bacteria thrive, enhancing the fermentation process. When feeding, it’s advisable to discard a portion of the starter (about 50g) and replace it with an equal weight of flour and water, a process known as feeding. This practice not only nourishes the starter but also helps to manage its size.
Storing your sourdough starter can be approached in two primary ways: refrigeration or keeping it at room temperature. For individuals who bake frequently (about once a week), storing the starter at room temperature is beneficial, allowing for constant fermentation.
Conversely, if baking is less frequent, refrigeration is recommended. By placing the starter in the fridge, the fermentation slows, and you can extend the time between feedings to once every couple of weeks. Before using a refrigerated starter, it’s advisable to remove it from the fridge, let it come to room temperature, and feed it a couple of times to revive its activity.
A common concern among bakers is dealing with a sleepy or sluggish starter. If your starter seems less active than usual, it may need a slight adjustment in its feeding schedule or a new feeding method.
Consider increasing the frequency of feedings, doubling the amount of flour and water used, or experimenting with different types of flour, such as whole wheat or rye, which can provide additional nutrients.
Through these adjustments and careful monitoring, your sourdough starter can remain robust and ready for baking at all times, ensuring successful and flavorful sourdough bread.
Common Mistakes and Tips for Success
Creating a sourdough starter from scratch is an intriguing journey, yet it often comes with challenges that beginners may face. One of the most common mistakes is neglecting temperature control. Sourdough starters thrive in a stable, warm environment.
Rapid temperature fluctuations can upset the balance of microorganisms, leading to inconsistent fermentation. Ideally, maintain your starter in a location with a temperature range of 70°F to 75°F (21°C to 24°C), as this optimal warmth fosters a healthy growth of both wild yeasts and lactic acid bacteria, ensuring that the fermentation process is effective.
Another frequent pitfall occurs with the choice of materials used during the process. Using metal containers or utensils can negatively influence the health of your starter.
Metal can react with the natural acids produced during fermentation, potentially compromising your starter’s development. Instead, opt for glass, plastic, or wooden containers to minimize any adverse reactions.
Moreover, when feeding your starter, always use high-quality flour, such as organic and unbleached options, as this can significantly enhance the flavor and vitality of the starter.
Patience is paramount during this process. Many beginners become discouraged when they do not observe quick results.
Each sourdough starter evolves uniquely based on its environment and the flour types used. Tracking your starter's behavior and responsiveness to feedings is essential.
Observe any rise and fall patterns, as well as the aroma and texture. If your starter seems sluggish, extending the time between feedings or adjusting the feeding ratio can be beneficial.
Finally, ensure you are regularly discarding a portion of the starter to prevent it from becoming unwieldy, as this promotes a healthy balance of flour and water.
By being mindful of these common mistakes and adhering to the provided tips, your sourdough starter is more likely to flourish, paving the way for delightful bread-making success.
Premium Healthy Sourdough
Sourdough products delivered to your home
Sourdoughlogy
To Order Go To
Or
© 2024. Sourdoughlogy. All rights reserved.