Healthy Sourdough bread For you and your family!
The Secret to Getting a Perfectly Crisp Sourdough Crust Every Time"
Unlock the secrets to achieving a perfectly crisp sourdough every time! Learn essential techniques on hydration, oven settings, scoring, and troubleshooting to bake a golden, crispy, and delicious bread crust.
Grace Ng, Bloopy Loke
11/22/20246 min read
The Secret to Getting a Perfectly Crisp Sourdough Crust Every Time
Sourdough bread has a special allure, with its tangy flavor, airy crumb, and, most importantly, its perfectly crisp crust.
Achieving this crusty perfection, however, requires understanding the science and techniques behind the process.
Here, we’ll explore the role of the crust, the science that governs its formation, and how to choose ingredients and hydration levels to perfect your sourdough bread.
1. Understanding the Role of the Crust in Sourdough Bread
The crust is more than just a protective layer; it’s a hallmark of great sourdough bread. A well-baked crust contributes to the bread’s texture, providing a satisfying crunch that contrasts with the soft interior.
Its caramelized flavors, resulting from the Maillard reaction, elevate the overall taste of the bread, adding depth and complexity.
Beyond flavor and texture, the crust also plays a role in aesthetics. That golden-brown exterior, often adorned with artistic scoring, makes sourdough loaves as visually appealing as they are delicious.
Bakers often refer to the crust as the bread’s signature, showcasing their skill and attention to detail.
2. The Science Behind a Perfect Sourdough Crust
To achieve a crispy crust, it’s essential to understand the science behind its formation. Two main processes come into play: the Maillard reaction and caramelization.
The Maillard reaction occurs when proteins and sugars in the dough interact under high heat, producing a range of complex flavors and that iconic golden-brown color. Caramelization, on the other hand, is the browning of sugars, adding sweetness and richness to the crust.
Another crucial factor is moisture. During baking, steam in the oven helps gelatinize the dough’s surface, creating a thin layer that hardens into the crisp crust we crave.
Without adequate steam, the crust may become pale and dull instead of shiny and crunchy.
3. Choosing the Right Ingredients for a Crispy Crust
The ingredients you use can significantly impact the quality of your sourdough crust. High-quality flour with the right protein content is a must. Bread flour, which is higher in protein, helps create a strong gluten structure that supports a better rise and crust development.
Salt is another key ingredient, not just for flavor but also for texture. It strengthens the dough and enhances browning during baking. While water seems like a simple ingredient, its quality also matters.
Filtered or spring water free from chlorine or impurities can yield better fermentation, impacting crust development.
4. Hydration Levels: The Key to a Perfect Crust
Hydration level refers to the ratio of water to flour in the dough, and it’s a game-changer for crust texture. Higher hydration doughs (75% or more) tend to yield better crusts because the extra moisture creates more steam during baking. This steam aids in gelatinization and results in a thinner, shinier crust.
However, working with high-hydration doughs can be tricky, especially for beginners. They’re stickier and harder to handle, requiring careful techniques like stretch-and-fold to build structure. Once mastered, though, the payoff in crust quality is well worth the effort.
5. The Role of Proper Shaping and Scoring
The journey to a flawless crust begins long before the dough meets the oven. Proper shaping is critical for building tension in the dough, which directly impacts how the crust forms.
When shaping sourdough, you aim to create surface tension by folding and tightening the dough into a smooth, taut shape. This surface tension helps the dough expand evenly in the oven, allowing the crust to develop uniformly without cracking haphazardly.
Scoring is the next vital step. Using a sharp blade or lame, you make shallow cuts on the surface of the dough just before baking. These cuts act as escape routes for steam, guiding the dough’s expansion during the initial stages of baking.
Without scoring, the dough might split unpredictably, leading to uneven or overly dense crusts. Scoring also adds an artistic touch, allowing you to create intricate designs that elevate the visual appeal of your loaf.
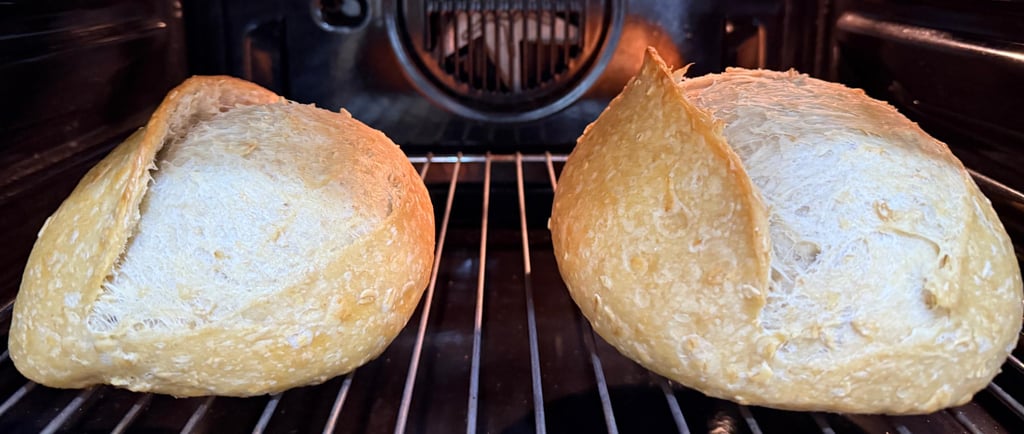
6. Mastering Oven Temperature and Steam
The oven environment is where the magic truly happens. Preheating your oven to its highest temperature—typically around 475°F to 500°F (245°C to 260°C)—is essential. A hot oven jumpstarts the Maillard reaction, which is responsible for the rich, golden-brown crust.
Steam is equally critical during the first 10 to 15 minutes of baking. It keeps the outer layer of the dough moist, delaying crust formation and allowing the bread to expand fully (a process known as oven spring). Without steam, the crust can set too early, limiting the bread’s rise and resulting in a denser loaf.
To create steam in a home oven, you can use a Dutch oven, which traps moisture released by the dough, or place a pan of hot water at the bottom of the oven. Spraying water onto the oven walls just before loading the dough is another effective method.
7. Baking Times and Techniques for Crispiness
The length of baking and specific techniques used can make or break your sourdough crust. Baking times vary depending on the size of your loaf, but a general rule is to bake for at least 30 to 40 minutes.
For the first half of baking, steam is crucial for expansion. However, once the crust begins to form, removing the source of steam allows the crust to dry out and become crispy. In a Dutch oven, this is achieved by removing the lid halfway through the bake.
Extending the baking time by a few extra minutes after the bread appears done can enhance the crust’s crispness. To avoid burning, lower the oven temperature slightly during these final minutes. This technique ensures the moisture inside the loaf doesn’t soften the crust as it cools.
8. Cooling and Storing Your Bread
One often overlooked aspect of crust perfection is proper cooling. When you remove your sourdough from the oven, resist the temptation to slice into it immediately. Cooling on a wire rack allows excess steam to escape, solidifying the crust. Cutting too soon traps moisture, softening the crust you worked so hard to achieve.
For storing sourdough, avoid airtight containers, as they can cause the crust to lose its crispness. A paper bag or bread box strikes the perfect balance, keeping the interior soft while preserving the crust. If your crust softens over time, you can refresh it by reheating the loaf in the oven at 350°F (175°C) for 5 to 10 minutes.
Troubleshooting Common Crust Issues
No matter how experienced a baker you are, achieving the perfect sourdough crust can sometimes be tricky. Here are some common crust problems and tips for solving them:
1. Soft or Soggy Crust
If your crust lacks crispness or feels soggy, it could be due to insufficient baking or improper cooling. Ensure you bake your sourdough until it reaches a rich, golden-brown color.
Cooling the bread on a wire rack is essential, as this allows moisture to escape evenly. If the crust remains soft, try extending the baking time slightly while monitoring for burning.
2. Too Thick or Tough Crust
A crust that’s overly thick or tough may result from excessive baking temperatures or over-steaming. Use a thermometer to verify your oven’s heat settings, and limit steaming to the first 15–20 minutes of baking to avoid excessive moisture retention.
3. Pale or Dull Crust
A pale crust often signals insufficient heat or lack of sugars for caramelization. Boost your oven's temperature and ensure your dough ferments long enough to develop natural sugars. Adding a pinch of sugar or malt powder can also enhance browning.
4. Burnt Crust
A burnt crust can be due to overly high temperatures or placing the bread too close to the oven’s heating element. Use a baking stone or Dutch oven to create even heat distribution, and consider reducing the temperature for the final baking phase.
Pro Tips for Advanced Bakers
Once you’ve mastered the basics, there are advanced techniques you can explore to take your sourdough crust to the next level:
1. Experiment with Flavors and Textures
Brushing the loaf with water or egg wash before baking can add a glossy finish and enhance crispness. For a rustic appearance, dust the surface with flour. You can also sprinkle seeds, oats, or herbs for additional flavor and texture.
2. Optimize Your Scoring Technique
Creative scoring not only controls how your bread expands but also influences how the crust forms. Deep, bold cuts create more defined cracks, while delicate scoring produces intricate designs. Practice different patterns to see how they impact crust crispness.
3. Extend Baking Time for a Deeper Crust
For a darker, crunchier crust, leave the bread in the oven with the door slightly ajar after turning it off. This lets residual heat work its magic without overbaking the interior.
Frequently Asked Questions About Sourdough Crusts
Why is my crust hard but not crispy?
This may be due to insufficient steaming during the initial bake. Steam allows the dough to expand fully before the crust hardens. Use a pan of water or ice cubes in the oven to create a humid environment.
Can I achieve a great crust without a Dutch oven?
Yes, while Dutch ovens provide consistent steam, alternatives like using a baking stone and a water pan can also produce excellent results. Ensure the oven is preheated to a high temperature for the best effect.
Does hydration impact the crust?
Absolutely. Higher hydration doughs create more steam inside the bread, leading to a thinner, crispier crust. Experiment with hydration levels to find what works for your recipe and environment.
Final Thoughts: The Joy of the Perfect Crust
The journey to mastering sourdough baking is as rewarding as the final result. Each loaf teaches you something new, and the perfect crust is a symbol of your dedication to the craft.
Whether you're troubleshooting common issues, refining your techniques, or simply enjoying the artistry of scoring, remember that every loaf brings you closer to mastery.
So embrace the process, savor your successes, and share the joy of sourdough with friends and family. A perfect crust isn’t just about texture—it’s about the love and effort baked into every loaf.
Premium Healthy Sourdough
Sourdough products delivered to your home
Sourdoughlogy
To Order Go To
Or
© 2024. Sourdoughlogy. All rights reserved.